If you’ve ever walked the bustling streets of Lagos, you’ve likely caught the warm, yeasty aroma of Agege bread wafting from a roadside vendor or bakery. Soft, slightly sweet, and delightfully fluffy, Nigerian Agege bread is more than just food – it’s a nostalgic staple in Nigerian households. But what exactly is Agege bread, and why has it earned such legendary status?
Test your baking skills with the Easy Agege bread recipe at home, which will blow your mind and satisfy your cravings!
Baking your own homemade Agege bread is an affordable, healthy, and convenient hack. You can enjoy it for breakfast, as a snack, or even for dessert. Once you have fluffy Nigerian bread, you can make plenty of other dishes.
There are many oven recipes, but baking authentic Agege bread is a must-try. It’s practical because you no longer have to go out for bakery bread. Using basic Agege bread ingredients, you can make homemade Agege bread for everyone to enjoy.
What is Agege bread?
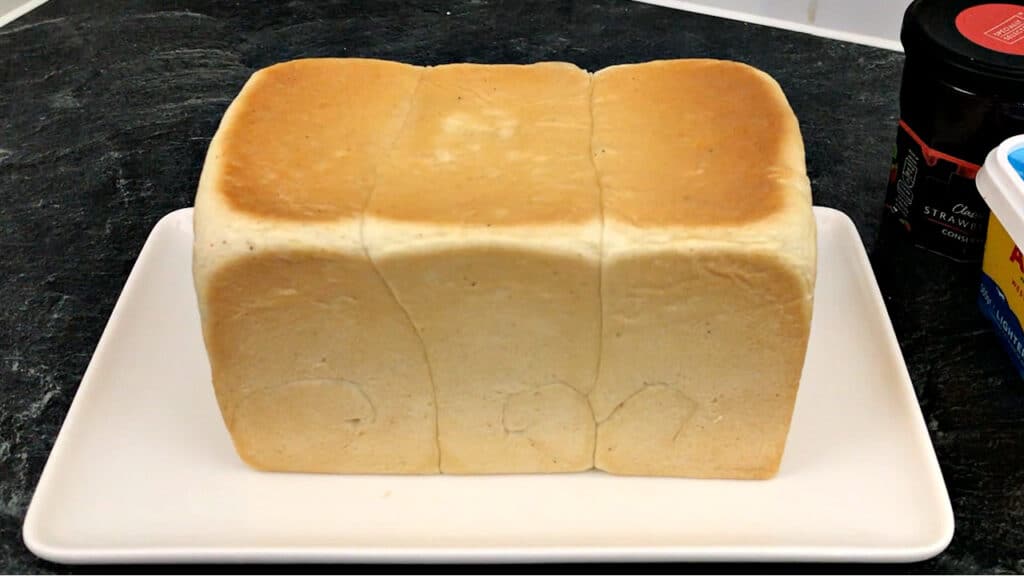
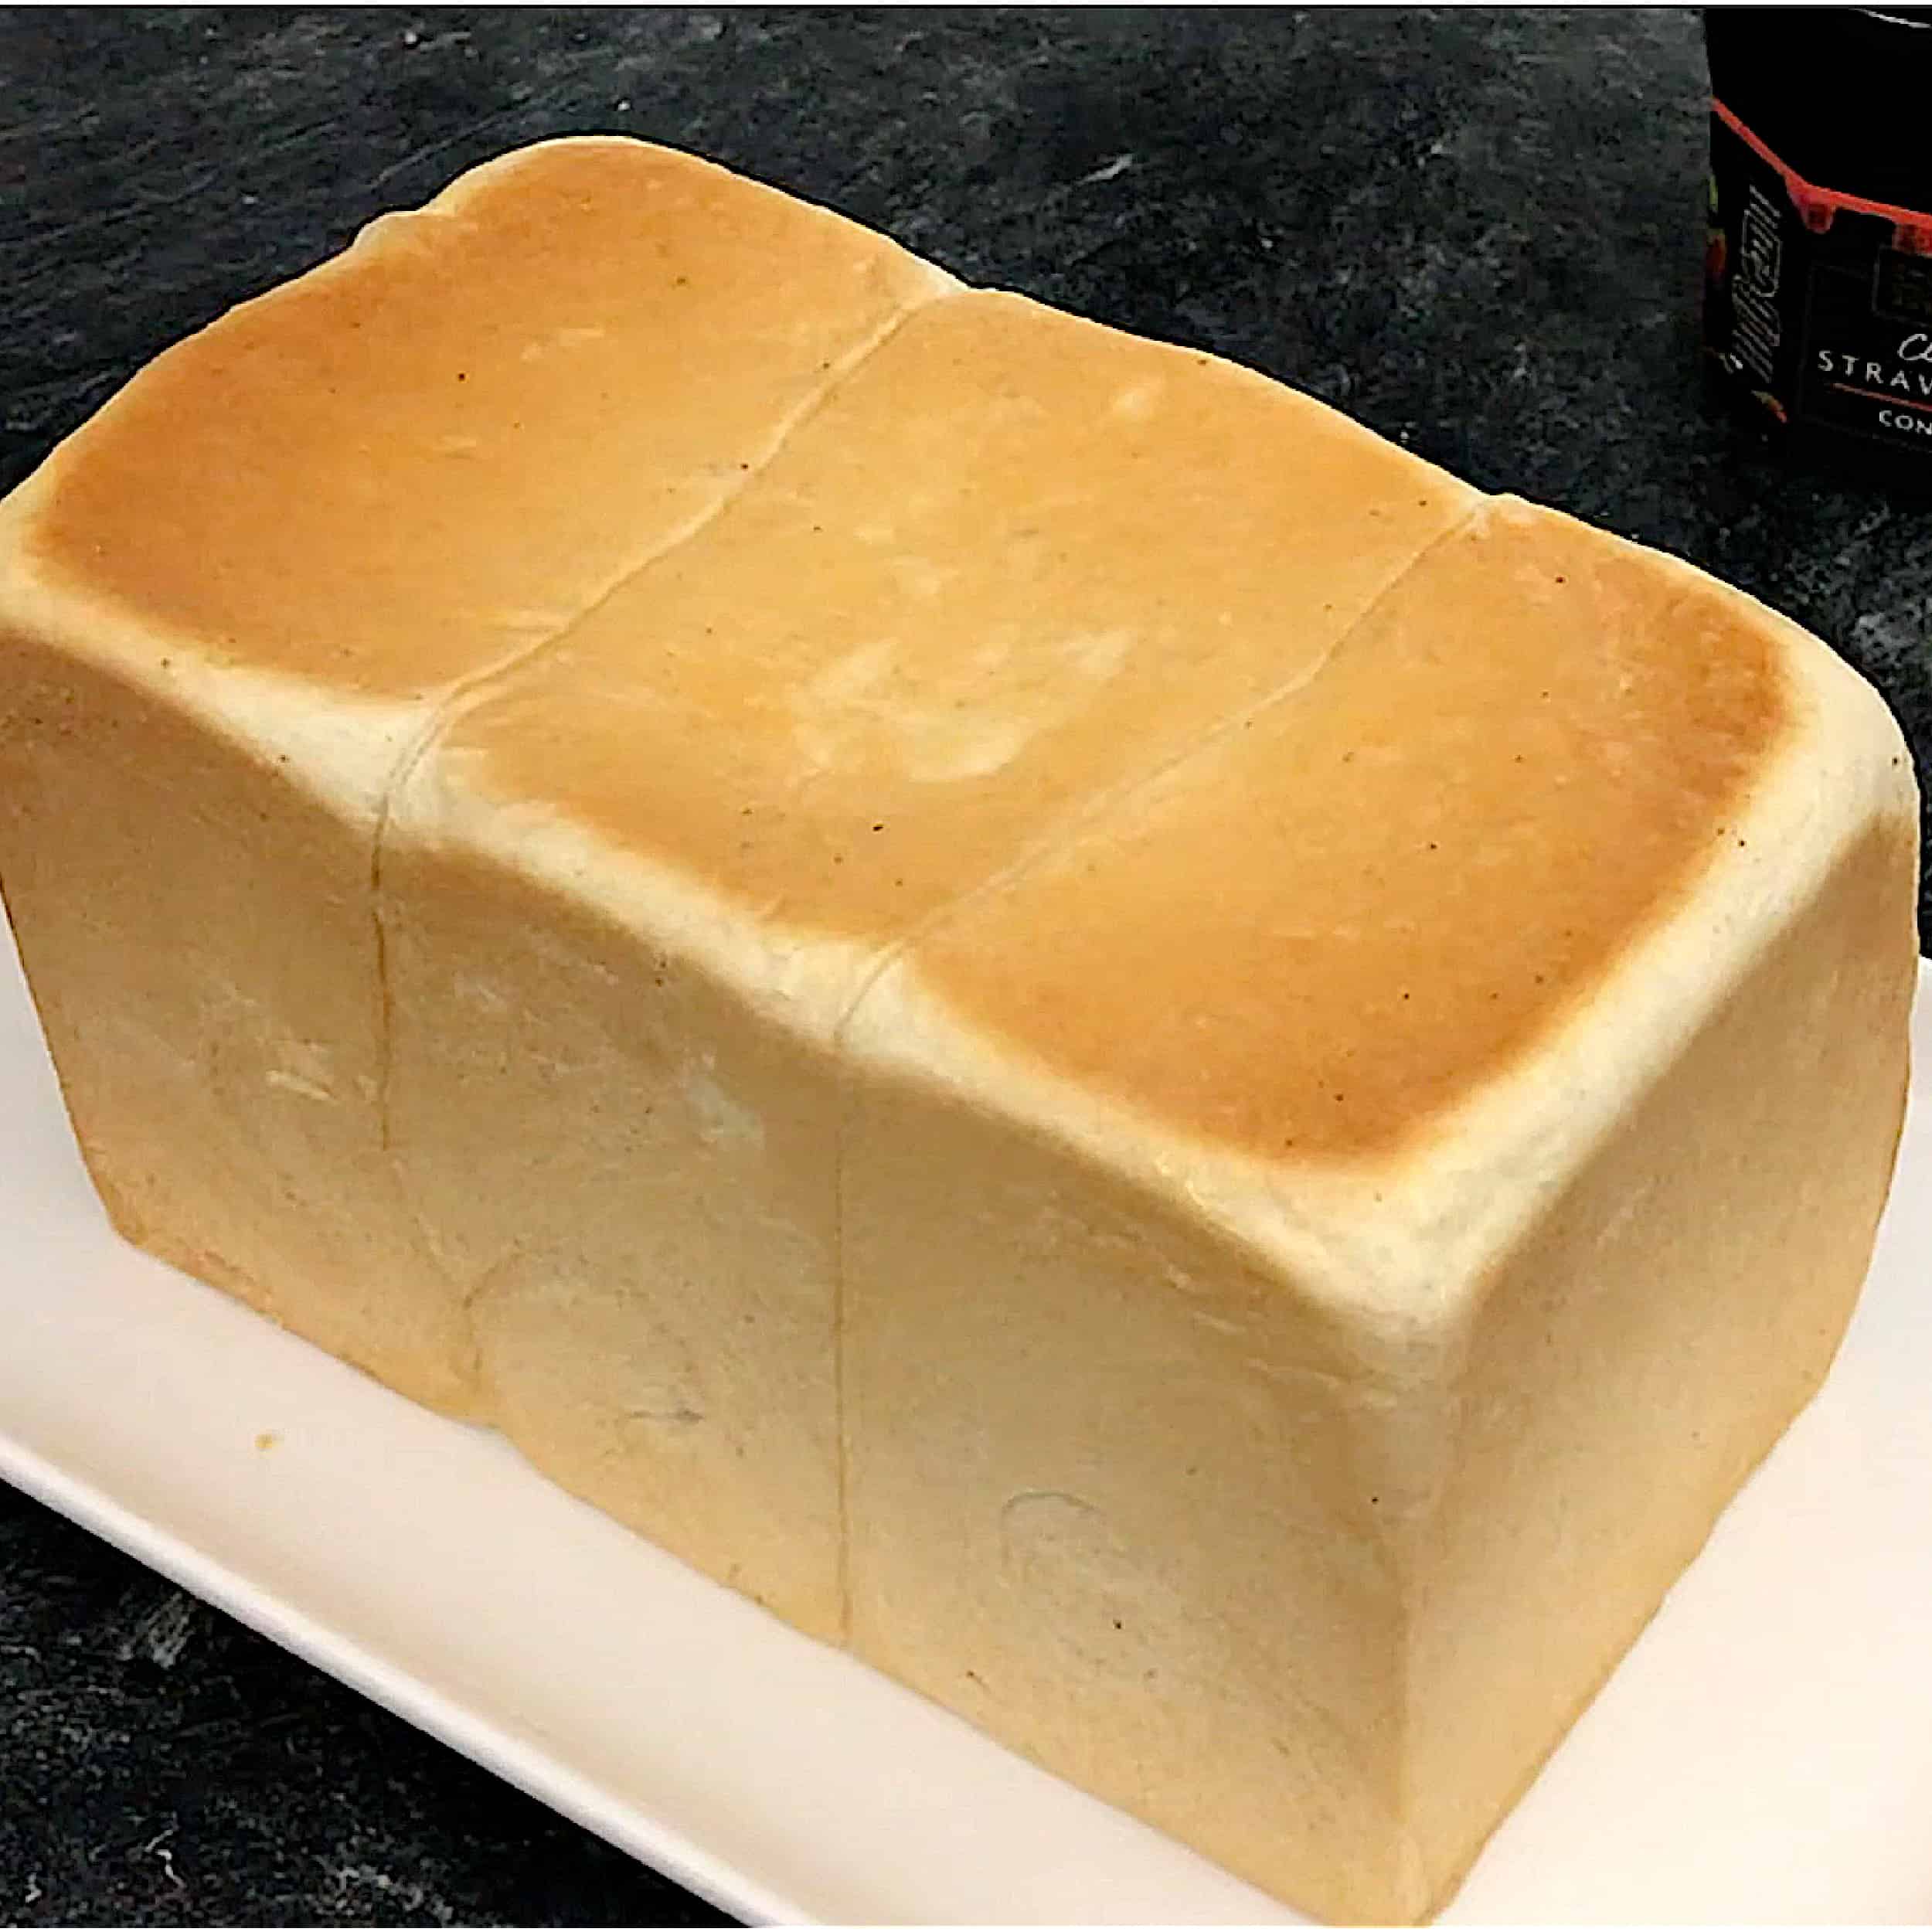
Agege bread is a popular Nigerian loaf known for its pillowy texture and slightly sweet flavor. Originating from the Agege suburb in Lagos, Nigeria, this bread has become a symbol of home for many Nigerians around the world. Made with flour, yeast, sugar, and often powdered milk, its unique texture comes from a combination of enriched dough and a tight baking tin that encourages vertical rise.
Pin this recipe on Pinterest to save for later
This soft Nigerian Agege bread tutorial will surely give you the best fluffy homemade Nigerian white bread, which is buttery and milky! What would you like to eat with this soft homemade agege bread?
Agege Bread vs. Other Types of Bread
Unlike French baguettes or crusty sourdough, Agege bread has no crunchy crust. Instead, it boasts a soft, golden-brown exterior and a chewy, stretchy crumb that holds up perfectly to butter, or ata dindin (fried stew), akara (bean cakes), moi moi (bean pudding), Ewa Agoyin, mackerel stew, gizzard stew, and fried eggs. It’s similar to brioche but with less fat, making it both indulgent and practical for everyday meals.
Table of Contents
- What is Agege bread?
- Agege Bread vs. Other Types of Bread
- How to Make Agege Bread at Home (Easy Recipe)
- Agege Bread Ingredients
- Directions
- History of Agege bread
- Tips
- Easy Bread Recipe Variations
- Recommended Tools
- Where to Buy Agege Bread
- How to Serve the Bread
- Storage Tips
- Nutritional Info
- Frequently Asked Questions
- Homemade Bread (+VIDEO) Recipe
How to Make Agege Bread at Home (Easy Recipe)
You will learn all about making an easy bread recipe in this blog post. I’ll tell you everything you need to know and do to make perfect bread for you and your family.
You can even share this authentic Agege bread recipe with your loved ones to let them experience the fun of breadmaking!
Agege Bread Ingredients
Let’s start with the ingredients you need to make this easy bread recipe:
Strong bread flour
What’s your go-to flour for making bread? Mine is strong bread flour.
Did you know that strong bread flour can be up to 14% protein? With this flour, you can make fluffy, soft, and chewy bread at home. The flour will also help with the structure and texture of the bread.
Bread dough may need a bit of kneading, but it’ll surely be worth it. According to the Webstaurant Store, strong bread flour can produce light and airy bread since it has more protein and gluten.
What other recipes can you make with strong bread flour? You can also use it for No-Oven Bread, Air Fryer Bread, and Braided Bread!
Yeast
Every bread recipe needs some yeast.
One secret ingredient in the easy bread recipe is yeast. It causes the bread to rise, resulting in a crust that is both inside and out. The Online Pastry School suggested that yeast is a leavening agent for an airy and light texture.
There are active dry and instant yeast, but I suggest using active dry yeast. You also need yeast to make African Puff Puff, Pizza Dough, and Twisted Korean Donuts.
Powdered milk
You might be surprised at how powdered milk can make a difference in your bread recipe.
Powdered milk gives the bread a smooth texture and extra-tasty quality. It even helps give the bread a golden brown color. The mild, milky, and sweet flavor is absolutely perfect for your bread.
Powdered milk can give the bread more volume, better flavor, and a darker crust. Aside from powdered milk, you can also use almond, coconut, and plant-based milk for healthy options.
Salted butter
Salted butter in bread? Why not, right?
What I love about using salted butter for bread is that it can make the bread last longer. In fact, you can make the easy bread recipe tastier with the salt from the butter.
According to Baking Bites, salted butter also has leavening properties to help the yeast function better. It’s the same butter I use for Mashed Potatoes, Nigerian Coconut Egg Rolls, and Almond Loaf Cake – I always get the best results!
Eggs
This best Agege bread recipe step by step will not be complete without eggs.
To make soft and fluffy agege bread, add eggs to the bread dough. The egg caramelizes for a golden brown crust as you cook the bread. Don’t worry; you can use many egg substitutes for your easy bread recipe.
You can use egg not only for the bread itself but also for the filling! Make Egg and Cheese Sandwich, Egg Mayo Sandwich, and Egg Omelet Toast to make your bread and eggs truly worth it.
Seasoning
What seasoning works best for authentic Nigerian Agege bread? In this recipe, I suggest using salt, sugar, and nutmeg. This will give you the perfect blend of sweet, salty, and subtle flavors. You can also use plenty of other herbs and spices.
However, choose the ones that best suit the flavor of the traditional agege bread baking.
Can you believe these are all you need to make the traditional Nigerian bread recipe? Buy these on your next grocery trip to cook the best bread ever!
The Best Agege bread recipe step-by-step. Below are simple steps on how to bake Agege bread without a bread machine.
Directions
It’s time to go to the fun part – baking the easy bread recipe!
- Mix the strong bread flour, powdered milk, granulated sugar, salt, nutmeg, and yeast in a bowl.
- Knead the dough in a stand mixer or by hand for 3 minutes.
- As the dough is kneading, add the salted butter gradually.
- Then, knead for an additional 12 minutes.
- Use a pastry brush to grease the loaf pan with melted butter or oil.
- Grease the lid of the loaf pan as well.
- After kneading, place the dough on a floured, flat surface.
- Use a dough cutter to divide the dough into three equal parts, each weighing 255 grams.
- Then, mold each dough part into a ball.
- Use a rolling pin to flatten the dough gently.
- Roll each portion of dough into a cylindrical shape.
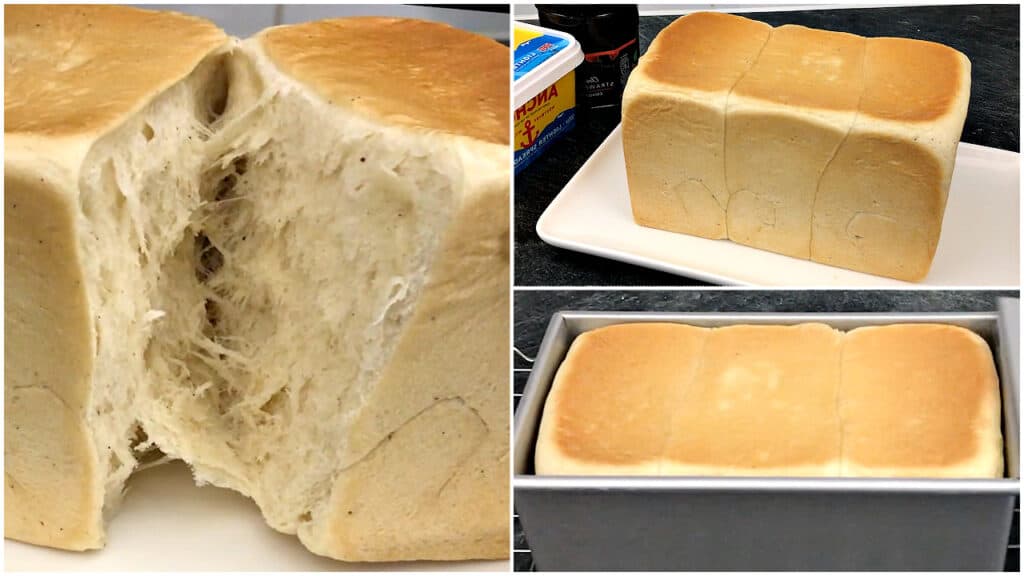
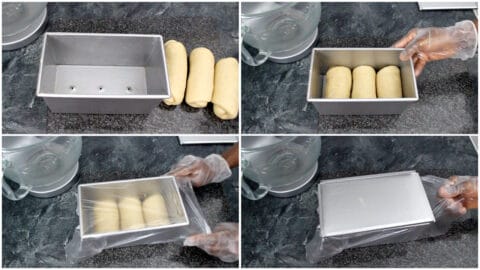
- Place each dough in the baking pan in a vertical position.
- Cover the baking pan with clingfilm and cover it with a lid.
- Set the loaf pan aside and let the dough rise for 45 minutes to 1 hour.
- Remove the cling film and cover it with the lid before placing it in the oven.
- Bake it in the oven at 150°C for 18 minutes.
- Once baked, remove the bread from the loaf pan and let it cool at room temperature. Enjoy!

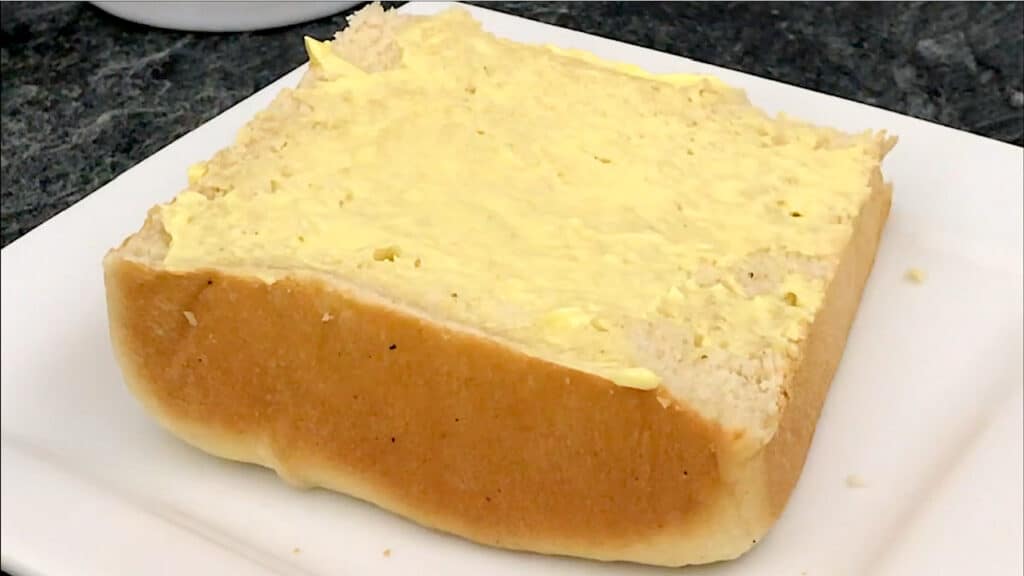
And just like that, you can enjoy the Easy Bread Recipe! Cut into it and see how fluffy and heavenly it is. Spread some butter on it or eat the bread as it is!
History of Agege bread
Agege bread originated in the Agege area of Lagos, Nigeria, during the 1970s. Due to its soft, dense texture and slightly sweet taste, it became popular as a cheap, filling food for workers and commuters. Baked in local wood-fired ovens, it was widely sold by street vendors and quickly became a staple in Lagos and across Nigeria. Named after the railway stop that helped spread it, Agege bread remains a beloved part of Nigerian street food culture today.
Tips
What to Avoid When Making the Easy Agege Bread Recipe
- Measure your ingredients properly using a kitchen scale or measuring cups.
- Cover the dough as it leavens to let it rise properly.
- Proofing is the process of allowing the dough to rise.
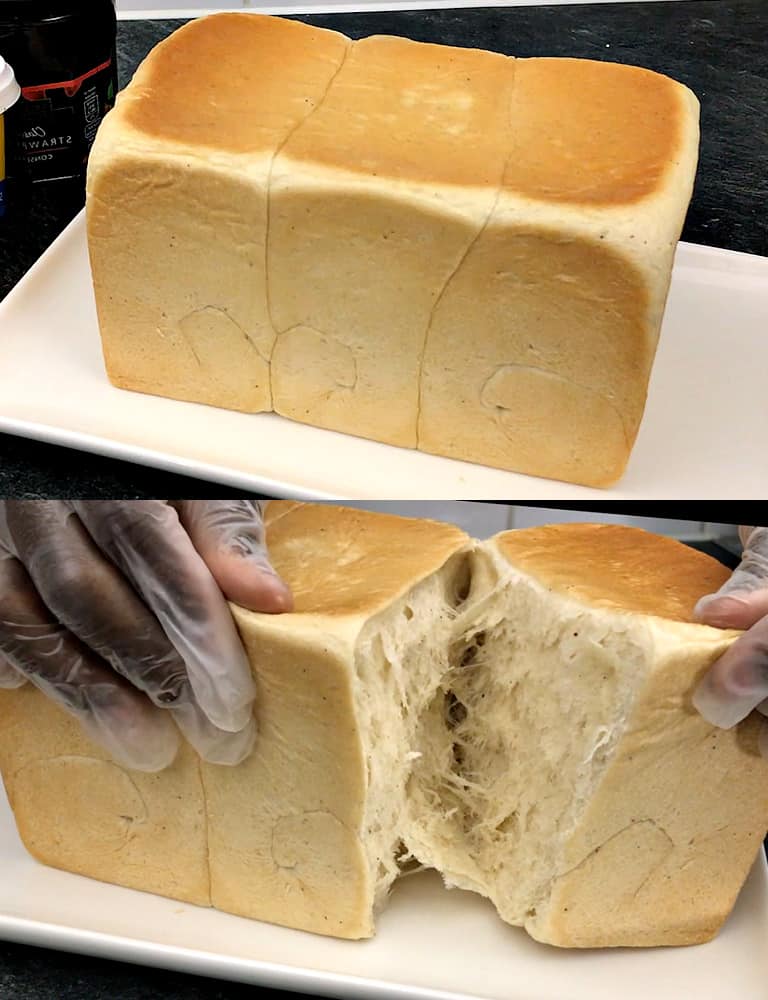
- Don’t overproof the dough so that it is easy to remove from the container.
- To avoid overproofing, gently press your finger into the bread. If the indentation comes and goes quickly, then it needs more time for proofing. If the indentation takes time to disappear, then the bread has been sufficiently and adequately proofed.
- Also, remember to set your timer for the right time for proofing.
- Use a kitchen timer or the timer on your phone to monitor each step in the baking process.
- Moreover, do not overknead the bread, as this will leave it with a flat and rubbery texture, making it difficult to chew.
Reasons Why Your Dough is Not Rising
If your dough has not risen during the proofing stage, then the outcome of the bread can be dry, flat, and rough.
Here are some of the reasons why your dough is not rising and also some solutions you can do:
- Check if you can still use the yeast.
- Use room-temperature yeast to let the dough rise properly.
- Don’t forget to knead the dough until it is ready.
- You can knead the dough by hand for about 25 minutes or until ready for baking.
- Let the dough rest at room temperature because yeast is sensitive to temperature. Yeast can die at extremely high or low temperatures.
How to Properly Knead Dough by Hand
Breadmaking is not possible without kneading the dough.
Kneading helps create the structure and texture of the bread. Always remember to flour your surface before placing the dough—this is crucial to prevent the dough from sticking to it.
- Use the bottom of your hand to push the dough downward and upward simultaneously.
- Then, fold the dough in your direction and press it down using the heel of your hand.
- Practice the downward and outward motions for a better kneading technique.
As you go along, continue to flour the surface and your hands when you notice the dough starting to stick to the surface. The kneading duration depends on what you are baking, but for bread, knead the dough for at least 25 minutes.
Another way to check if the dough is adequately kneaded is to do the “windowpane test”.
Get a small piece of dough and hold it between your thumb, index finger, and middle finger. As you pull your fingers away, notice how the dough stretches out.
The dough has been kneaded sufficiently if it remains elastic and shows no breakage. However, if the dough separates between your fingers, it needs more kneading.
Easy Bread Recipe Variations
There is more than one way to make the Easy Bread recipe.
For a gluten-free bread recipe, you can substitute the all-purpose flour with gluten-free all-purpose flour and add gluten-free baking soda. For flavor and texture, you may also add honey, olive oil, or apple cider vinegar.
On the other hand, I suggest using unbleached flour and active dry yeast for those who prefer vegan bread, as they offer a better structure and nutritional value.
The great thing about making bread at home is that you can bake it according to your preferences. You can substitute ingredients for diet-friendly alternatives and even add other flavors of your choice.
Meanwhile, for a more baby-friendly bread recipe, you can use four simple ingredients: bread flour, dried yeast, olive oil, and water! Mix them, make the dough, put it in the oven, and your baby can enjoy healthy, homemade bread!

You can add allspice, cinnamon, nutmeg, rosemary, sesame seeds, garlic, and even ginger to give your bread a unique taste.
I also suggest using desiccated coconuts, raisins, and dark chocolate for a pop of flavor and color. For instance, you can use almond milk or chocolate almond milk as a substitute for powdered milk.
Be as creative as you want with your bread, but make sure to adjust the ingredients, timing, measurements, and procedure.
Want more bread recipes? Try these:
Recommended Tools
- Oven: For best results, bake the bread in the oven.
- Loaf pan: Bake the bread in a loaf pan for a more structured texture.
- Stand mixer or hand mixer: Use a mixer to mix and knead the dough.
- Pastry brush: Use this brush to grease your loaf or baking pan with oil or butter.
- Whisk: Use a whisk to mix the contents.
- Measuring cups and spoons: Use the right amounts of ingredients when making bread.
- Use small glass bowls to: Prepare your ingredients.
- Dough cutter: Use this tool to separate the dough into your desired portions
- Rolling pin: Roll out the dough using a rolling pin.
- Clingfilm: Cover the dough with clingfilm to proof.
This post contains affiliate links, which means I earn commission income from qualifying purchases at no extra cost to you. Please read the full disclosure for more information.
Visit my shop for more products.
Where to Buy Agege Bread
Can’t bake right now? Agege bread is increasingly available online through African grocery stores or at local Nigerian markets and African shops. Search on Google for “Agege bread near me” or try platforms like Amazon, Instacart, or African food speciality sites.

How to Serve the Bread
How do you usually enjoy your bread?
There are many ways of serving bread you make at home. You can spread butter, mayonnaise, melted chocolate, strawberry jam, peanut butter, almond butter, guacamole, cashew butter, ewa Agoyin, gizzard stew, fried stew, moi moi, akara, mackerel stew, fried eggs, and more.
It can also be served with a bowl of creamy soup on a cold and rainy day. You can also make sandwiches of different kinds with protein variants, cheese, vegetables, and sauce.
For instance, you can make any of the following recipes:
The leftover bread to make bread pudding, salad croutons, or bread crumbs for other dishes. For beverage options, you can pair it with the following:
What to serve with bread

Sauces & Condiments
Strawberry Jam Recipe

Breakfast & Brunch
Fried Eggs (With a Tasty Twist)

High Protein
High-Protein Beans Recipe

Healthy African
How to Make Moi Moi
Storage Tips
- At room temperature: Store in an airtight bag at room temperature for up to 3 days.
To thaw frozen bread, put it in a toaster with medium to high heat. Or ou can let it defrost on your countertop overnight.

Nutritional Info
A typical slice of Agege bread contains around 120–150 calories, depending on the ingredients used. While it’s not a low-carb food, its simple ingredients make it a comforting alternative to the overly processed white bread.
Frequently Asked Questions
Is Agege bread healthy?
Agege bread is reasonably considered healthy compared to other types of bread. Among other ingredients, it contains milk, egg, butter, and nutmeg. Thus, it is rich in minerals and vitamins and should be included in a balanced diet.
What makes Agege bread so soft?
Agege bread is so soft for different reasons. The incorporation of butter, milk powder and yeast contributes to its softness by adding moisture, tenderness, and fluffiness. The kneading process develops the gluten in the flour, giving the bread structure, elasticity, and softness.
What are the four main ingredients in bread?
The four main ingredients in bread are flour, yeast, salt, and water. These ensure the bread’s structure, and you can customize the flavor with your preferred seasoning.
What are the three main ingredients of quick breads?
For quick bread, you will need flour, leavening agents, and seasonings. Try different combinations to find the ones that best suit your preferences and tastes.
How is bread made in 5 steps?
With this Easy Bread Recipe, bread is definitely made simpler. You need to prepare the batter and dough. Then, let it prove the right level of rise. Bake it in less than an hour for the best bread recipe!
What makes bread nice and fluffy?
According to Baking Mad, the key to preparing good bread is to keep the salt, sugar, and yeast separate in the mixing bowl. Consequently, sugar and salt are known to reduce the effectiveness of yeast if combined immediately.
Incorporate yeast to achieve a soft and fluffy texture in homemade bread. It allows the bread to rise, adding air and height to the recipe. You should also add powdered milk for a higher rise and a moister texture.

Have you tried Agege bread before? Share your favorite way to eat it in the comments – or follow us for more West African recipes and more straight to your inbox!
Homemade Bread (+VIDEO)
Ingredients
- 3¼ cups strong bread flour
- 3 tbsp powdered milk
- 3 tbsp sugar
- ½ tsp nutmeg
- ½ tsp sea salt
- 2 tsp dry yeast (fast action)
- 1 egg
- 3 tbsp salted butter
- 6.43 fl oz water (at room temperature)
Instructions
- Combine the dry ingredients in a bowl• In a bowl, mix the strong bread flour, powdered milk, granulated sugar, salt, nutmeg, and yeast together.• Add the water and egg.
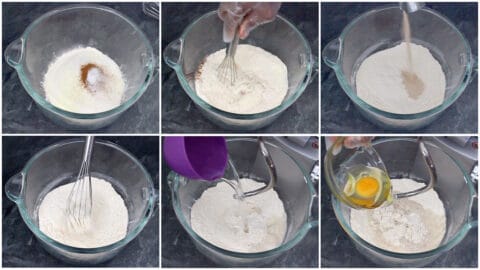
- Make the dough• For this step, using a stand or hand mixer for faster kneading is best. • Set the mixer at the speed of two options and knead for 3 minutes. • Use the kneading attachment of your mixer for the best results.• While the dough is kneading, gradually add the salted butter and knead for another 12 minutes

- Grease the baking pan • While the dough is kneading, prepare the loaf pan by brushing it with melted butter or oil. This will allow you to remove the bread from the pan easily when it is cooked. • It can also prevent the tearing and breaking of the bread. • Grease the lid of the baking pan as well.

- Mold the dough• After kneading for 12 minutes, place the dough on a floured flat surface. • Divide the dough into three parts, 255 grams each. • Then, mold each dough into a ball and use a rolling pin to flatten the dough slightly. • Roll each piece of dough until it turns into a cylindrical shape. The pieces will come in handy when it’s time to divide the baked bread into sections.

- Arrange the molded dough in the baking pan• Place each dough in the loaf pan in a vertical position. • Cover the baking pan with cling film or a food bag and secure it with the lid of the loaf pan. • Set the loaf pan aside in a warm place to allow the dough to rise for 45 minutes to 1 hour. It will take time before the yeast leavens, leading to a tastier and fluffier bread.
- Bake, cool and serve• Before placing it in the oven, remove the cling film or food bag. • Preheat oven to 150ºc fan oven / 300ºf / 3 gas mark.• Bake for 18–20 minutes, or until golden brown (or until fully baked)and the top sounds hollow when tapped.• Optional: Brush with melted butter after baking for a glossy, soft crust.• Let cool in the pan for 10 minutes, then transfer to a wire rack.• Slice and enjoy with butter, jam, beans, or fried eggs.

Video
Notes
- In making bread, pay attention to four things: ingredients, time, measurements, and procedure.
- Oven temperature varies from oven to oven, depending on the type of oven: fan oven, gas oven, or conventional oven. Hence, the bread should be baked for at least 18 minutes in a fan oven or 25 minutes in a conventional or gas oven, both at 150ºc, preheated oven.
- To preserve the bread’s moisture, wrap each slice in aluminium foil or cling wrap and store it in a cool and dry place or the freezer.
- Greasing the pan will make it easy to remove the loaf from the pan when it’s cooked.
- It can also prevent the finished product from tearing and breaking.
- Allowing the dough to rest and rise in the loaf pan will take time, but it will lead to tastier and fluffier bread.
- Use the kneading attachment of your mixer for the best results.
- Freezing can retain most of the bread’s moisture compared to refrigeration.
- You can make your bread without a mixer. For combining the ingredients, you can use a whisk, and for kneading, you can use your bare hands.


Thanks for the impactful information to encourage home made foods
Hi Silver, I am glad you found the recipe impactful. Thank you for this kind comment.
Hello,
Where does one find “strong bread flour” in Nigeria?
Thank you so much, Ivana, for visiting and taking the time to leave a comment. Golden Penny Prime Flour or Golden Penny Easy Bake Flour are some of the perfect flour options for making bread in Nigeria. Thank you.
Thank you for your straightforward and detailed recipe and explanation. I liked my bread.
Thank you so much, Ubi, for visiting and taking the time to leave a comment. I am glad to know you found this recipe straightforward, detailed and explanatory. Thank you.