Whenever you want to make bread without an oven, the No-Oven Bread recipe is a must-try!
There’s always more than one way to make bread and even without an oven, you can still cook one. It’s almost like baking bread because it will still give you the perfect crust and tasteful crumbs.
I’ve tried this recipe so many times and I always get the best results, I’m sure you will too. It’s such an easy, practical, and useful way of making bread for everyone in your home to enjoy.

Pin this recipe on Pinterest to save for later
From now on, you won’t need an oven to be a baker because the No-Oven Bread recipe is a lifesaver. It will certainly give you bread with the perfect crust, tender crumbs, and flavorful quality!
How to Make No-Oven Bread
No oven? No problem. The No-Oven Bread is a nifty way of making the perfect bread without baking at all. It’s going to give you fantastic results from the inside of the bread to the outside.
There’s a first time for everything, right? Make your own No-Oven Bread, right here, right now!
Ingredients
Let’s start with everything you need to make No-Oven Bread!
Bread flour
What better flour to use for bread than bread flour, right? Bread flour is a high-protein type of flour that’s especially effective for making bread. Due to its protein content, it will give the bread an airy and soft yet chewy quality.
It can also help you knead and mold the bread to your desired shape. The bread will also become soft, tender, and moist for the right texture. This is popularly used in making sourdough, brioche, and other baked goods.
It’s my go-to flour for Air Fryer Bread, Braided Bread, and Soft Bread!
Yeast
Always say yes to yeast in your bread recipes, especially the No-Oven Bread. You need to add yeast to make the dough easier to knead. It also gives the bread a high rise for a fluffy and puffy quality that you’re always looking for in bread.
The yeast also adds to the rich and crusty texture of the loaf. The gluten network is the secret to good bread, so enhance it by adding yeast. I also use it for Ghanaian Bofrot, Puff Puff, and Pizza Dough!
Salted butter
Make the No-Oven Bread so much better with some good quality salted butter. It doesn’t just give the bread a pleasant flavor, but it also adds an awesome buttery aroma when you bite into the bread.
Aside from improving flavor and texture, salted butter will also make the bread last longer. According to Sally’s Baking Addiction, salter butter also gives the bread a longer shelf life.

Egg
In bread recipes, eggs are binders for all the ingredients. The egg is also good for the texture, flavor, and color of the bread. Masterclass shared that the egg even adds a leavening effect.
There are also lots of egg substitutes you can use for making bread. I make sure to use an egg in every bread recipe and it always helps me get the best results, in flavor and in texture.
Seasoning
Don’t forget to season it for flavorful homemade bread. Sugar, nutmeg, milk powder, and sea salt add sweetness and distinct flavors. Milk powder can even help with the crust of the bread.
You only need these simple ingredients to make the most stellar homemade bread! If you have these household condiments in stock, let’s put them to good use by baking!
Directions
Now, unleash the inner baker in you and try this bread!
- Sieve the bread flour, sugar, nutmeg, sea salt, and milk powder into a bowl.
- Add the yeast and mix with a spatula until well combined.
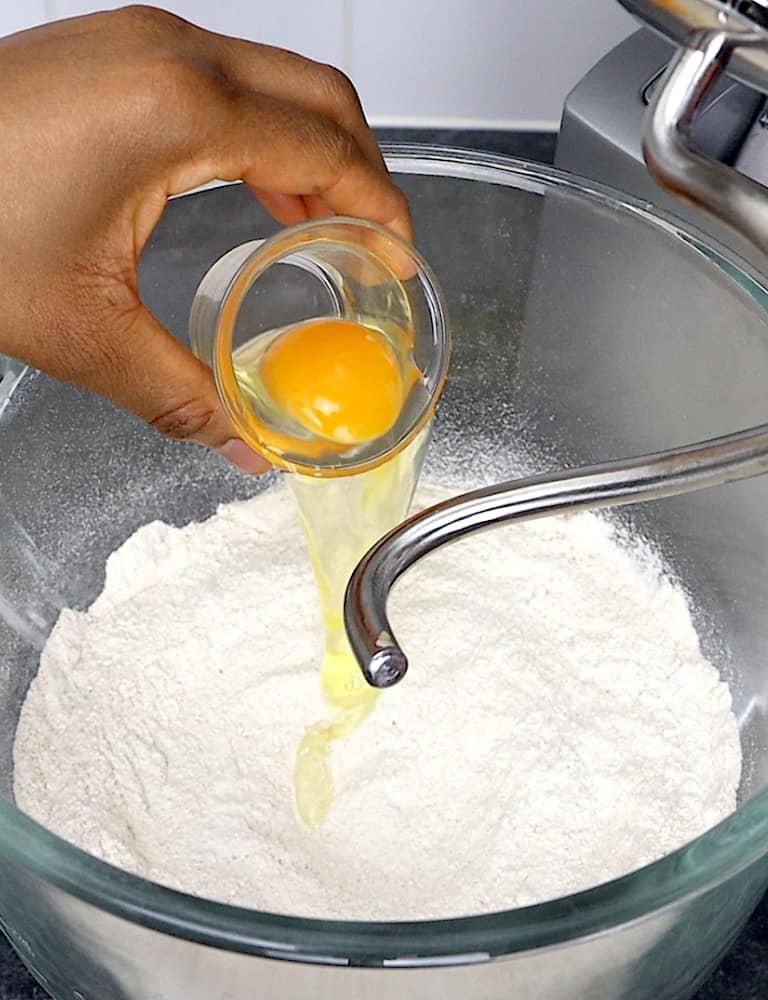
- Then, pour in the water and egg.
- Knead it using a mixer for five minutes or a whisk for 25 minutes.
- Gradually add the softened salted butter while kneading.
- Cover and let the dough rest for at least 15 minutes.
- Measure all sides of the loaf pan and cut the baking paper accordingly.
- Insert it into the pan and butter or grease the lid.
- Cut the dough into three equal parts.
- Roll each piece with a rolling pin.
- Fold it inwards until you form a cylindrical shape.
- Repeat the process on the same dough once more.
- Arrange them in the lined loaf pan and cover them with the lid.
- Set it aside in a warm place to rise for 45 minutes to one hour or until it doubles in size.
- Place a large pot on the stove set at high heat.
- Put the ceramic beans inside and the iron rack in the middle.
- Cover the pot and preheat it for 30 minutes until it reaches 200°C.
- Put the loaf pan on the iron stand. Let it cook for 10 minutes.
- Use a towel or potholder to turn it onto the other side to bake for another 10 minutes.
- Cook the other sides for five minutes each. Remove it from heat and allow it to cool.
No-Oven Bread has never been this easy. Don’t forget to share how your bread turned out!
Tips
Storing Baking Ingredients
- Store the flour, nutmeg, sea salt, and milk powder in their original packaging or containers.
- Place them in cool and dry areas to prolong shelf life.
- On the other hand, the yeast is best stored in the fridge.
- Store the salted butter in the fridge or the freezer.

Lining the Loaf Pan
Use non-stick baking paper, a pencil, a ruler, and scissors for the lining.
- Position the loaf pan in the middle of the baking paper.
- Mark the corners with the pencil and connect them to the edge of the paper. You should be able to form squares on each corner of the paper.
- Then, cut the squares out for a cross-like figure.
- You can easily fit it in the loaf pan!
This is a helpful tip so you can effortlessly take the bread out of the pan.
How to Roll the Dough Without a Rolling Pin
Rolling the dough is fun, even if you don’t have a rolling pin! As alternatives, you can use a wine bottle, a drinking glass, a tumbler, a clean PVC pipe, or even your hands.
Storing Dough with Yeast
After trying this recipe, I’m sure you will want to make it more often in the future. So, check out these methods on how you can store yeasted dough.
- You can refrigerate the dough before it rises but note that this might slow down the leavening process.
- Allow the dough to expand in the fridge for up to 24 hours.
- It’s better to put the dough in the fridge once it has fully risen.
- For the rolled-out dough, you can wrap it in aluminum foil or cling film and transfer it into freezer bags to store in the freezer to last up to 2 weeks.
- To use, let it thaw in the fridge overnight. Then, let it rise on the counter.
Common Bread Dough Problems
If you encounter any of these problems, then check out these solutions you can use as remedies.
The dough is not rising or lacks rising
The rise in the dough is essential to make fluffy and soft bread. Use a sufficient amount of yeast, as it is a powerful leavening agent. Use quality and viable yeast for the dough.
The bread is soggy
This problem may be due to the material of the loaf pan. It is also why turning the bread as it cooks is important. Moreover, you can continue baking it for a few more minutes to expand the bread thoroughly.
The dough is sticking to your hands and on the surface
Sprinkle flour or semolina on the surface and on your hands to prevent sticking. However, do not overuse it as it can also add to the bread’s gluten, which may lead to a tough texture. You may also use butter or oil to grease.
Overproofed dough
Proofing of bread can take up to 2 hours. To prevent having over-proofed dough, check it for doneness after at least 45 minutes. Apply pressure on the dough, and it is ready for baking if it bounces back.
The bread is too crumbly
If the bread crumbles easily, then this means that it lacks moisture. Don’t skip the water to provide better structure and texture from the inside out.
No-Oven Bread Variations
Is there any other way to make the No-Oven Bread different? Of course!
To make it vegan-friendly, you can skip the eggs and go for egg substitutes instead, but note that this will change the bread’s texture and flavor. On the other hand, you can make it gluten-free by using gluten-free flour.
You can also try lactose-free milk such as almond milk or coconut milk. In fact, you can mix it with mashed ripe bananas to give the bread a tropical fruit flavor. Actually, you can season it with cinnamon, vanilla extract, or nuts.

If you don’t have time to cook it on the stove, then you can bake it in the oven. Set the oven to 200°C and let it bake for up to 45 minutes. There’s no need to turn the loaf pan over as it will be heated as a whole in the oven.
Recommended Tools
- Pot: Cook the bead in a pot on the stove.
- Iron stand: Place this at the center of the pot to position the pan.
- Ceramic baking beans: Use these to distribute heat for thoroughly cooked bread.
- Loaf pan: Bake the dough in a loaf pan to maintain form.
- Mixer: Knead the dough using a mixer.
- Silicone pastry brush: Grease the surface and the loaf pan with a silicone brush.
- Silicone spatula: Use this to mix and incorporate ingredients into the batter.
- Whisk: Combine ingredients well with a whisk.
- Measuring cups and spoons: Be precise with the condiments for the fluffiest and tastiest bread.
- Small glass bowls: Prepare the ingredients in glass bowls.
- Dough cutter: Slice the dough into sections with a dough cutter.
This post contains affiliate links, which means I earn commission income from qualifying purchases at no extra cost to you. Please read the full disclosure for more information.
Visit my shop for more products.
How to Serve No-Oven Bread Bread
You can serve the No-Oven Bread like any other bread that you enjoy!
This bread recipe is so flavorful that you can eat it on its own. You can put all sorts of toppings and spreads, such as strawberry jam, peanut butter, or guacamole. In addition, you can turn it into French Toast, Bread Pizza, and sandwiches!
It pairs well with eggs, hotdogs, bacon, tuna, moi moi, and more! You can have it at any time of the day to supply you with energy and nutrients. You may try coffee, milk, hot chocolate, iced tea, smoothies, and other nutritious drinks for beverages.
The No-Oven Bread is one of the dishes to serve for breakfast or snacks. It’s perfect for kids and adults at any time of the day. Don’t forget to cook it for your next family bonding!
Drink Recipes

Made From Scratch
Cranberry Syrup: A Sweet & Tangy Superfood

Drinks & Juices
Pomegranate Milkshake Recipe

Drinks & Juices
Celery Juice
Storage Tips
- At room temperature: Put the bread in a bread box, container, or resealable bag and store it at room temperature to last up to three days.
Frequently Asked Questions
Can you bake bread on top of the stove?
Of course, you can! Baking bread on the stove is one of the best alternatives to using an oven. It’s a good solution for when you don’t have access to an oven. It will still give you the best crust, crumbs, and flavor!
Can you bake crustless bread?
Yes, you can bake crustless bread. All you need is flour, milk, yeast, and some seasoning. First, stir the butter and milk together. In a separate bowl, mix and knead the flour and butter.
Then, let the dough rise until it doubles in size. Bake the dough in a preheated oven and you’ve got yourself crustless bread!
How to make bread without a baking pan?
As long as the container is oven-safe, you can use it to make bread in place of a baking pan. Be sure to use materials that will hold the shape of the bread well. Also, line the container with parchment paper to stop the bread from sticking.
Is it possible to bake without yeast?
You can still bake without yeast because there are other leavening agents you can use. For instance, you can try baking powder or baking soda instead.

No-Oven Homemade Bread (VIDEO)
Equipment
Ingredients
- 400 g bread flour
- 40 g sugar
- 1 tsp nutmeg
- ½ tsp sea salt
- 30 g milk powder
- 7 g yeast
- 190 ml water
- 1 egg
- 40 g salted butter (softened)
Instructions
- Sieve the bread flour, sugar, nutmeg, sea salt, and milk powder into a bowl.
- Add the yeast and mix with a spatula until well combined.
- Pour in the water and egg.
- Knead it using a mixer for 5 minutes or a whisk for 25 minutes.
- Gradually add the softened salted butter while kneading.
- Cover and let the dough rest for at least 15 minutes.
- Measure all sides of the loaf pan and cut the baking paper accordingly.
- Insert it into the pan and butter or grease the lid.
- Cut the dough into 3 equal parts.
- Roll each piece with a rolling pin.
- Fold it inwards until you form a cylindrical shape.
- Repeat the process on the same dough once more.
- Arrange them in the lined loaf pan and cover them with the lid.
- Set it aside in a warm place to rise for 45 minutes to 1 hour or until it doubles in size.
- Place a large pot on the stove set at high heat.
- Put the ceramic beans inside and the iron rack in the middle.
- Cover the pot and preheat it for 30 minutes until it reaches 200°C.
- Put the loaf pan on the iron stand. Let it cook for 10 minutes.
- Use a towel or potholder to turn it onto the other side to bake for another 10 minutes.
- Cook the other sides for 5 minutes each. Remove it from heat and allow it to cool.
Video
Notes
- Cook (bake) the bread on all of its sides.
- Measure the ingredients well to balance them for the right flavor and texture.
- Substitute ingredients for condiments that are best suited to your diet and preferences.
- Dispose of expired bread with molds, foul odor, tough texture, and an unpleasant flavor.
- Aside from loaf tins, you can also make use of cake pans, pie pans, and other similar materials to bake the bread.


