Can you use an oven instead of a dehydrator? The short answer is, yes you can!
The dehydrator is a kitchen appliance that works to remove moisture from food, leaving it dry, crispy, and long-lasting. It’s great for making your food last longer without losing its flavor or nutrients.
But in case you don’t have a dehydrator, that’s okay because you can always use your oven. An oven can be an excellent alternative to a dehydrator, especially if you don’t want to buy your own dehydrator.

Pin this recipe on Pinterest to save for later
Are you ready to learn how to use the oven for dehydrating food? I’ll guide you every step of the way, it’s easy, convenient, and effective! Don’t worry; this technique is a tried and tested method you can trust.
What is a dehydrator used for?
From its name, the dehydrator reduces the water content of the food to dehydrate or dry it and make it last longer. I love how it can help avoid wasting food, especially fruits and veggies.
In fact, you can even make your seasoning by drying herbs and spices of your choice. It’s a good way of drying food to make healthy snacks. In its own way, the dehydrator can be truly life-changing.
Using my dehydrator, I discovered how to make Dried Apple Slices, raisins, chili flakes, paprika, and more. There are plenty of other recipes that you can do with your dehydrator, too.
Benefits of Dehydrating Food
Whether you’re using a dehydrator, an oven, or even the sun, dried food has its benefits.
First, it turns fresh food into lasting and healthy snacks or treats. You can even store your favorite seasonal fruits and veggies, so you never have to run out. It dries your food without losing too much of its flavor or nutrients.
In addition, using a dehydrator helps retain the benefits of the food to keep it healthy even after it dries. You will surely love how crunchy and delicious these dried snacks are.
Dehydrating is also an effective way of enjoying a vegan diet. For instance, dried nuts and fruits are great ingredients for meal preps, salads, granola bars, and plenty of other recipes.
It is also helpful for avoiding food waste. Dehydrating is also an excellent way of saving money, storing food, and maximizing space in your kitchen. You’re not just storing your food, but enjoying it, too.
In conclusion, drying food has numerous advantages that you can gain. Start reaping them by learning how to dehydrate them with an oven!
How to Use an Oven as a Dehydrator
Just follow these steps to use your oven as a dehydrator:
- Preheat the oven to 85ºC for about ten minutes.
- Prepare the ingredients with a knife or V-Blade Slicer.
- Then, line the oven tray with grill mesh or parchment paper.
- Place it on a cooling rack.
- Arrange the food on the rack in a single layer.
- Place them in the oven and let the oven dry them.
- You can flip the slices to dry both sides.
Remember to be patient when using the oven, especially if the food has lots of water. The average drying time can last between six to ten hours. Don’t worry, it’s always worth the wait.
And that is how you can convert an oven into a nifty dehydrator! Try it out with your favorite fruits and vegetables, and let me know how it turns out!
Oven-Dehydrated recipes

Snacks
Dried Apple Slices

Made From Scratch
Chili Flakes Recipe

Made From Scratch
Raisins: How Are They Made?
Best Foods for Using a Dehydrator
What foods can best put your dehydrator to the test? You can dehydrate food from fruits and vegetables to meats and herbs. According to Eating Well, the best fruits and veggies to dehydrate include the following:
- Apples
- Berries
- Tomatoes
- Mangoes
- Pineapples
- Bell peppers
- Zucchini
- Sweet potatoes
Transform meat like beef, chicken, and turkey into jerky treats. Add these to stews, salads, or dishes for variety and flavor. Put them in a jar, and you have yourself a healthy yet yummy snack.
Interestingly, grains such as quinoa and barley can also be dried to make flour for your baking needs. Herbs such as oregano, mint, and basil can be dried to cook the most perfectly seasoned dishes.
What do you plan on dehydrating in the dehydrator or oven?
Dehydrator vs. Oven
When choosing whether to use an oven or a dehydrator, here are some pros and cons that you may consider when making this decision.
Let’s start with the dehydrator! You can dry many foods at the same time because of their size, layers, and trays. It even has a thermometer and timer to make it easier to monitor.
It is specially made to spread heat and air for effective drying of food. However, a dehydrator can also be expensive. It also uses electricity and space in your kitchen, not a good option for small space living.
Meanwhile, an oven is more readily available than a dehydrator. It also dries the food quicker. Oven drying also doesn’t cause too many changes in the food. In fact, you may already have an oven right now.
Although, using an oven can be tricky when it comes to setting the time and temperature. It is also limited in terms of space because, most of the time, there are only one or two layers in the oven.
In conclusion, choose whatever depends on your most important factors! For instance, if your concern is space, it’s best to use a versatile oven. The dehydrator might be better if you want to dry food in bulk.
| Oven | Dehydrator | |
| Price | ✅ | |
| Space | ✅ | |
| Dehydrating Time | ✅ | |
| Nutrition | ✅ | |
| Cost of running | ✅ | |
| Usage | ✅ | |
| Utility | ✅ |
Important Tips
What do you need to remember when using your oven as a dehydrator?
Be patient
All good things take time, and dried food is certainly not an exception. After all, the best results are always worth waiting for, right? Drying foods can vary in drying time, some may even take a day or two.
Allow air
If your oven doesn’t have a fan feature, then you can leave the door slightly open to allow air inside. It also helps you achieve a crunchy and crispy texture. Just don’t leave it wide open to get the results that you need.
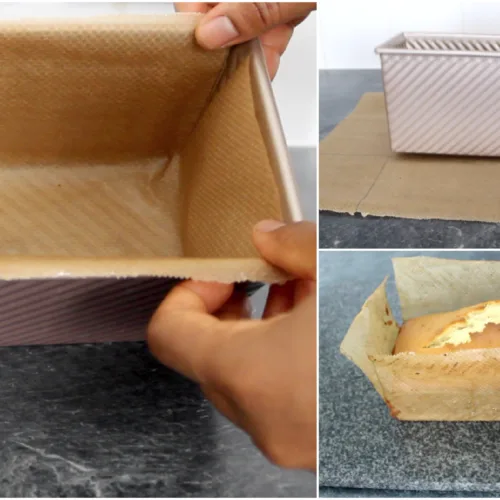
Line the tray
Place wax or parchment paper on the tray to keep the food together and to make cleaning easier. It will also make it easier for you to gather the foods after you have dried them.
Pay attention to the temperature
Dehydrate the food slowly at a low temperature to avoid burning it. Food can take several hours to dry, especially if they have water content. Check for the dehydrating time of the foods you want to dry.
Prepare the food well
Slice the food thinly, if needed. Evenly arrange it in a single layer with a bit of space in between to cook them all the way through.
Share your own tips for dehydrating in the oven or dehydrator!
More Dehydrator Alternatives
Even if you don’t have a dehydrator nor an oven, these alternatives may be great for you.
Microwave
- Spread the food on a microwave-safe dish.
- Then, set your microwave to the defrost setting.
- Let the food dry for about 30 minutes or until dried.
- Flip them every ten minutes to dry all sides.
Toaster Oven
- Preheat the toaster to 80°C.
- Arrange the fruits or veggies on a lined tray.
- Then, let it dry for at least six hours.
- Check and turn the food every 30 minutes.
Sun-drying
- Place the food on a lined tray.
- Cover the tray with a food net cover.
- Let it dry under the sun for a few days.
Conclusion
In conclusion, a dehydrator may be useful for storing food, but it’s not the only appliance that can dry your favorite food.
When it comes to food, there are always alternatives available. If you want to dry food without a dehydrator, then you can always use an oven to do the job for you. Not only does it bake, but now, it can also dehydrate.
And when you don’t have a dehydrator, use an oven! What matters most are the results – the healthy, tasty, healthy, and lasting quality of dried goods. Are you excited to use your oven as a dehydrator?